
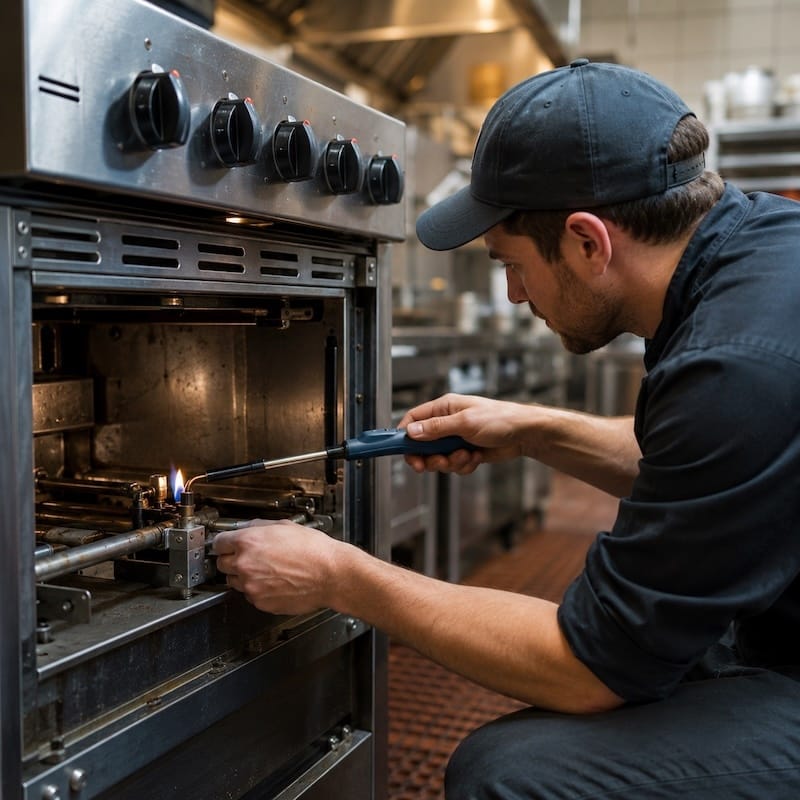
If you have ever walked into your kitchen in the morning and found one of your ovens stone cold, you already know the mild panic that follows. A pilot light that has gone out is one of the most common issues in a commercial kitchen, and the good news is that it is also one of the more straightforward to address. In most cases you do not need to wait for a technician; you just need to know what you are doing.
That said, “straightforward” does not mean “careless.” You are working with gas, and gas demands respect. This guide walks you through how to light a pilot safely and correctly, why pilots go out, and when the issue is something beyond a simple relight.
One important note before you begin: the information in this article applies only to equipment equipped with a standing pilot. Ovens that use an electronic ignition system, an intermittent pilot, or an automatic ignition system should not be manually lit unless you are specifically directed to do so by the manufacturer’s instructions. Attempting to manually light an automatic ignition system can result in equipment damage, unsafe operation, or personal injury. If you are not certain which type of system your oven uses, check the manual before doing anything else.
Before You Do Anything Else
The steps that happen before you actually light the pilot are the ones that matter most for safety. Skipping them or rushing through them is where problems start.
The first thing to do is smell. If there is any detectable gas odor when you approach the oven, stop immediately. Do not light anything, flip switches, use your phone, or do anything that could create a spark. Get people out of the area, leave the building if the smell is strong, and call your gas provider or emergency services. A faint smell that clears quickly after the oven has been off for a few minutes may just be residual gas from the extinguished pilot, but anything stronger is a leak problem, not a lighting problem, and needs to be handled as one.
Assuming there is no gas odor, locate your oven’s manual before proceeding. Commercial ovens vary significantly by brand and model, and the pilot location, access panel, and lighting procedure can differ in ways that matter. If you do not have a physical copy, the manufacturer’s website will almost always have a downloadable version.
Gather what you need before you start. At minimum, you will want a long-reach lighter or long fireplace matches. A standard lighter or short match puts your hand too close to the burner during ignition, which is a burn hazard. Keep a flashlight handy too, since pilot assemblies are often tucked into corners that are hard to see clearly.
Special Considerations for Confined Spaces and Propane
Additional caution is warranted any time you are working with gas-fired equipment in a confined space, such as a food truck, mobile kitchen, or kiosk. Adequate ventilation is critical before you attempt to relight any pilot flame in these settings, since gas can accumulate far more quickly in a small, enclosed area than in an open kitchen.
Equipment running on LP, or propane, gas calls for extra precautions. Unlike natural gas, propane is heavier than air, so it can accumulate or “pool” beneath equipment and in low-lying areas if a leak is present, which makes propane leaks particularly dangerous in confined spaces. If you detect any propane odor, do not light the pilot. Shut off the gas supply if it is safe to do so, ventilate the area thoroughly, and contact a qualified service provider before going any further.
Understanding Where the Pilot Is Located
Commercial ovens typically have one or more pilot lights located near the burner assembly. Depending on the design, the pilot may be accessible from inside the oven cavity, through a small opening near the bottom front of the unit, or behind an access panel on the side or front.
On most standard commercial range ovens, you will find the pilot assembly by opening the oven door and looking toward the back lower section of the cavity, near where the burner tube runs. Some models have a small metal shield around the pilot to protect it from drafts; others have pilots accessible from the front without opening the door at all.
If your oven has a standing pilot, meaning a pilot meant to burn continuously, the process of relighting it is relatively simple, and the steps below apply. Ovens with intermittent or automatic ignition are a different matter, as covered above, which is one more reason to confirm what you have in the manual before you start.
Step-by-Step: Lighting the Pilot on a Commercial Oven
Once you have confirmed there is no gas odor, located your manual, and identified where the pilot assembly is on your specific unit, here is the general process for relighting a standing pilot.
Turn everything off and wait. Set the oven knobs to off and give the unit at least five minutes before doing anything else, which lets any residual gas dissipate. Do not skip or shorten this step.
Locate the pilot assembly. Using your flashlight, find the pilot tube, typically a small metal tube near the main burner with a small opening where the flame should appear when lit.
Set the gas valve to the pilot position. Many commercial ovens have a dedicated pilot setting on the main gas valve or control knob, separate from normal operation. Turn the knob to this position. On some units you will need to press the knob in while turning it. Refer to your manual for the specific action your oven requires.
Press and hold the pilot button or knob. Most commercial ovens have a reset button or require you to press in on the control knob while in the pilot position. This opens the gas valve to the pilot tube and allows gas to flow. Hold it in firmly.
Bring the flame to the pilot tube. With your long-reach lighter or match already lit, bring the flame to the tip of the pilot tube while keeping the button pressed in. The pilot should ignite within a few seconds. If it does not light after about ten seconds, release the button, wait another five minutes, and try again. Do not keep introducing flame while holding the gas valve open for extended periods.
Hold the button in after the pilot lights. Once the pilot flame is established, continue holding the button or knob in for 30 to 60 seconds. This heats the thermocouple, the small sensor next to the pilot flame that tells the gas valve the pilot is actually lit and it is safe to keep gas flowing. Releasing too soon is one of the most common reasons a pilot goes out again immediately.
Release slowly and observe. After the full 30 to 60 seconds, slowly release the button. The pilot flame should remain lit on its own. If it goes out, the thermocouple likely did not get hot enough; try once more with a longer hold. If it continues to go out, the thermocouple likely needs to be replaced.
Returning the Unit to Service
Getting the pilot lit is not always the final step. After the pilot flame is established and stays lit on its own, many gas valves require you to turn the control knob from the “Pilot” position to the “On” position before the main burner will operate. Leave the valve in the “Pilot” position and gas will not flow to the main burner even though the pilot itself is lit, and the oven will not heat.
Once you have moved the valve to the “On” position, set the oven to your desired temperature and confirm that the main burner ignites and operates as it should. Always verify proper burner ignition and operation after returning the gas valve to the normal operating position rather than assuming the oven is working simply because the pilot is lit.
Why Pilot Lights Go Out
Understanding why pilots go out can help you prevent it from becoming a recurring issue.
Drafts are one of the most common culprits. Exhaust fans, ventilation, and the constant movement of people and equipment create airflow that can extinguish a small pilot flame, especially one already burning low. If your pilots go out regularly, look at the airflow around your equipment during service.
Grease and debris buildup around the pilot tube can also interfere with the flame. Over time the small opening at the tip can become partially blocked, which weakens the flame and makes it more susceptible to going out. Regular cleaning of the pilot area helps prevent this.
A related and commonly overlooked cause is grease accumulation on the gas regulator vent. As grease and debris build up around the vent opening, the regulator may stop operating correctly, resulting in unstable gas pressure and intermittent pilot failures that are frustrating to diagnose. Keeping that vent clean prevents a lot of nuisance service calls, and we cover how below.
A failing thermocouple is another frequent cause. It is a small, inexpensive part, but it is essential to keeping the pilot lit. If yours consistently fails to hold the flame after relighting, replacement is usually a quick fix.
Low gas pressure can also cause pilots to go out or burn inconsistently. If multiple pieces of equipment have pilot issues at once, or if your pilot flames look smaller and weaker than normal, low supply pressure may be the cause and warrants a call to your gas provider or a technician.
Keeping the Gas Regulator Vent Clean
Because the regulator vent is such an easily overlooked source of pilot problems, it is worth building a simple inspection into your routine maintenance. A clean vent improves pilot reliability and reduces the intermittent failures that lead to unnecessary service calls.
Inspect the gas regulator periodically and clean any grease and residue from it using a cloth and warm, soapy water. Pay particular attention to the area marked “VENT” on the regulator body, and make sure the vent opening stays unobstructed at all times. It takes only a few minutes but has a meaningful effect on how reliably your equipment runs.
When to Call a Professional
Relighting a pilot is something your staff can reasonably handle with the right knowledge and precautions. But there are situations where the right call is to bring in a qualified technician.
If you smell gas at any point, stop and call a professional. If the pilot lights but the main burner does not ignite after you have returned the valve to the “On” position, there may be an issue with the gas valve or ignition system. If you have relit the pilot multiple times in a short period and it keeps going out despite proper technique, a thermocouple replacement or deeper inspection is probably warranted. And if there is any visible damage to the burner assembly, gas line connections, or control components, do not operate the equipment until it has been inspected.
Commercial kitchen equipment is a significant investment, and small issues have a way of becoming larger ones when left unaddressed or misdiagnosed. When something does not seem right, getting a professional set of eyes on it early is almost always cheaper than waiting until the problem forces the issue.
Keeping Your Ovens Running Reliably
Pilot issues are a normal part of operating gas equipment in a busy kitchen. Staff who know how to handle a simple relight safely keep your operation moving without downtime, and building regular inspection of your pilot assemblies, thermocouple, and regulator vent into your maintenance schedule reduces how often the issue comes up at all.
And when something goes beyond a simple relight, having a trusted commercial kitchen repair partner you can call makes the difference between a minor disruption and a full service shutdown.
Frequently Asked Questions About Commercial Oven Pilot Lights
Is it safe for kitchen staff to relight a commercial oven pilot?
In most cases yes, as long as the equipment has a standing pilot and staff are properly trained and follow safety protocols. Ovens with electronic, intermittent, or automatic ignition systems should not be manually lit unless the manufacturer directs it. Always confirm there is no gas odor before lighting anything. If there is any smell of gas that does not clear quickly, the job belongs to a technician.
How long should I hold the pilot button in after the flame lights?
Generally 30 to 60 seconds, though some manufacturers recommend longer. This heats the thermocouple enough that it signals the gas valve to stay open. Releasing too soon is one of the most common reasons a pilot will not stay lit.
My pilot is lit but the oven will not heat. What is wrong?
Usually the gas valve is still in the “Pilot” position. Many ovens require you to turn the control knob from “Pilot” to “On” before gas will flow to the main burner. If it is in the “On” position and the burner still will not ignite, there may be a valve or ignition issue that warrants a technician.
Why does my pilot keep going out after I relight it?
The most common cause is a thermocouple that is either not heated long enough during relighting or has worn out. Drafts, a partially blocked pilot tube, and a grease-covered regulator vent are also common culprits. The regulator vent in particular is easy to overlook and can cause unstable gas pressure that leads to repeated failures.
What should I do if I smell gas near the oven?
Do not light anything or operate any switches or electrical devices nearby. If the smell is faint and clears within a few minutes of the oven being off, proceed cautiously after ventilating. If it is strong or persistent, get people out of the space and contact your gas provider or emergency services before re-entering. This matters especially with propane in confined spaces, since propane is heavier than air and can pool in low-lying areas.
Can a dirty pilot tube or regulator cause the pilot to go out?
Yes to both. Grease can partially block the pilot tube opening, weakening the flame, and buildup on the gas regulator vent can disrupt gas pressure and cause intermittent failures. Keeping both clean as part of regular maintenance reduces how often you deal with pilot outages.